The "Rights and accesses" tool is found under the "My Registration" tab and its information is normally seen by all users. This tool is essentially used by the "Account Administrator" to create new user's account and to manage users accesses and privileges for the the CIDataSolutions™ users for your business. Normally the rights given to a regular user allows the user himself to view and edit its user's information. The "Account Administrator" has more tools to efficiently provide access to the CIDataSolutions™ tool set for his team, meaning each one can have a customized dashboard.
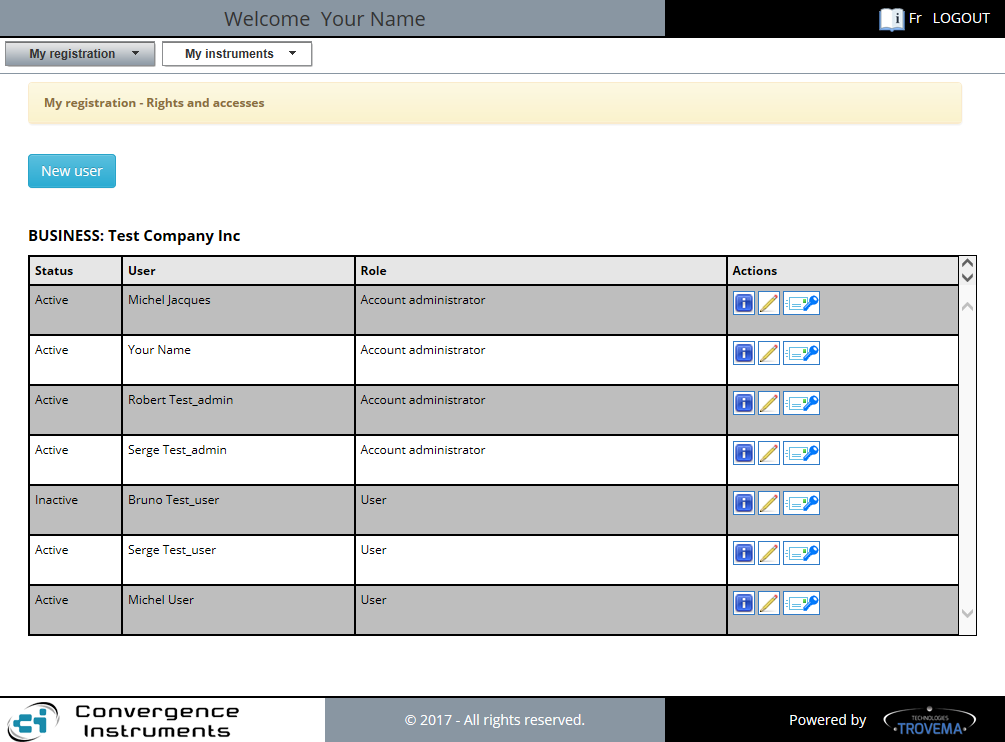
The "My registration - Rights and accesses" form allows the "Account Administrator" to create new users and manage the ones listed inside the "Business account".
In the top left corner, a  "New User" button is used to call the form to fill in the new user's information.
 "New user" tool:
When the "Account Administrator" clicks on the "New User" button of the "Rights and accesses" form, the following "User info" form is opened.
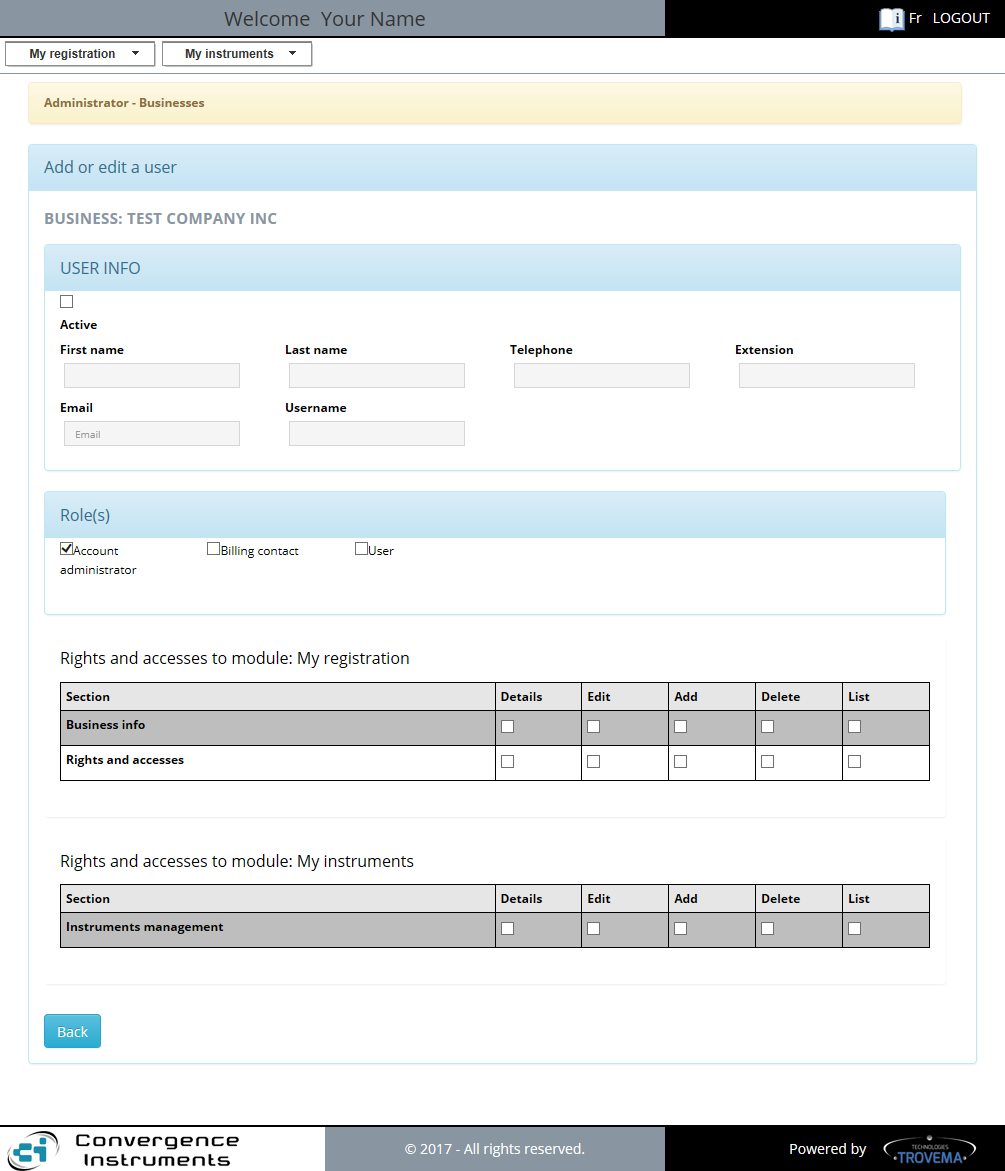
This form is used to grab personal information on the new user and assign provide him some rights and accesses among those available for his role(s) inside CIDataSolutions™ "Business account".
"User info" section:
The basic information to recognize who has access to the instruments your business owns inside your CIDataSolutions™ "Business Account".
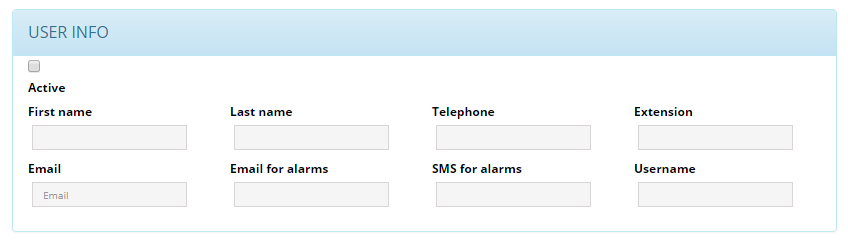
The fields are:
| 1. | "Active" check-box: To give access to the secured CIDataSolutions™ Web Application, the user must be active. If that person is no longer part of the team, but might be back at a later time, it is good to keep all his account history in the database and simply deactivate his access. |
| 2. | "First name" field: The one you know! |
| 3. | "Last name" field: The family name. |
| 4. | "Telephone" field: Important to us for providing you support if needed. Also of interest if you enrol a sub-contractor. |
| 5. | "Extension" field: The telephone extension inside your business. |
| 6. | "Email" field: This email address is used to send credentials to that person. So do not try to fool the system. |
| 7. | "Email for alarms": Provide a valid email address such that the person can be receive email alarms at any time from those instruments he is responsible for. |
| 8. | "SMS for alarms": Phone number of his mobile so he can receive alarm notifications sent by those instruments he is responsible for. |
| 9. | "Username": A name that identifies the user at the Login of a CIDataSolutions™ work session. All logged data in the database will associate actions to this username. |
|
"Role(s)" section:
The "Role(s)" section is useful for limiting pre-defined access within CIDataSolutions™ toolbox.

You check one or more roles to a user so he gains access to all the tools he need.
The roles are:
| 1. | Account administrator: In the present version of cidatasolutions, all the toolbox is made available to this profile. That could change with the evolution of the application. |
| 2. | Billing contact: This profile only has access to the "Business info" toolbox. |
| 3. | User: This profile's interest is to have access to the "Instrument management" tools. |
|
"Rights and accesses to module: My registration" section:
"My Registration" tool is set by the items checked in the following table. This section would normally be set by the "Account Administrator". But ... if the "Account Administrator" gives a normal "User" all of the "Rights and accesses" listed below, his role might be very similar to the one associated to the "Account Administrator".
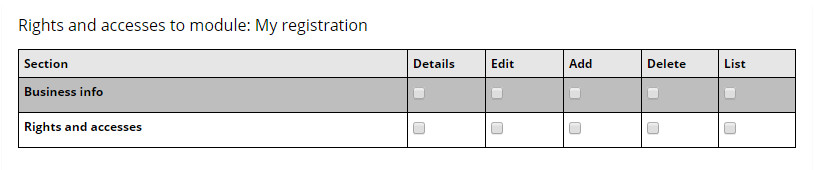
There are two components:
| 1. | The "Account Administrator" must decide, by clicking inside the check boxes, what the user can do with the "Business info" set in your cidatasolutions™ account: |
| 1. | Details: the user can see all the information available for the "Business info" tool. |
| 2. | Edit: the user is responsible for editing the business information at his will using the "Business info" tool. Basically, the name and relate address of your business. For more information refer to the "Instrument Installation and Configuration" section of this Web Help. |
| 3. | Add: Not available to the usual profiles. "CIDataSolutions™ System Administrators" would use that tool to recreate a lost business. |
| 4. | Delete: Not available to the usual profiles. "CIDataSolutions™ System Administrators" would use that tool to remove old customer that no longer do business with cidatasolutions. |
| 5. | List: The user has access to the list of users for his business. |
| 2. | The "Account Administrator" must also decide, by clicking inside the check boxes, what the user what "Rights and accesses" he gives to the user he is setting: |
| 1. | Details: the user can see all the details of his rights with the "Rights and accesses" tool. |
| 2. | Edit: the user is capable of editing his own rights at his will using the "Rights and accesses" tool. Basically, he can set them all and become an "Account Administrator" himself. |
| 3. | Add: Not available to the usual profiles. |
| 4. | Delete: Not available to the usual profiles. |
| 5. | List: The user has access to the list of all users rights inside your cidatasolutions™ business account. |
|
"Rights and accesses to module: My instruments" section:
Now is the time to provide the most useful rights to all members of your team. If the team is minute, most probably you should give them the full responsibility of the instruments they own10.

The "Account Administrator" must decide, by clicking inside the "Check Boxes", what the user can do with the instruments he owns:
| 1. | Details: the user can see all the information available for the instruments he own. |
| 2. | Edit: the user is responsible for editing the configuration of his instruments. Log interval, Time constant, ... For more information refer to the "Instrument Installation and Configuration" section of this Web Help. |
| 3. | Add: the user can add new instruments. Make sure he has access to the Instrument Manager program. For more information, please refer to the "Installation process" of this Web Help. |
| 4. | Delete: the user has the right to remove an instrument and all its related recorded data wlg files from the CIDataSolutions™ "Business Account" database. |
| 5. | List: The user has access to the list of users for his instruments. |
So we encourage you to be careful and give only those rights that are necessary!
Note 10: Instrument can have a single owner; so only one user can use the instrument; or be multiple-users when many of your users must share the instrument on a single or multiple projects at the same time.
|
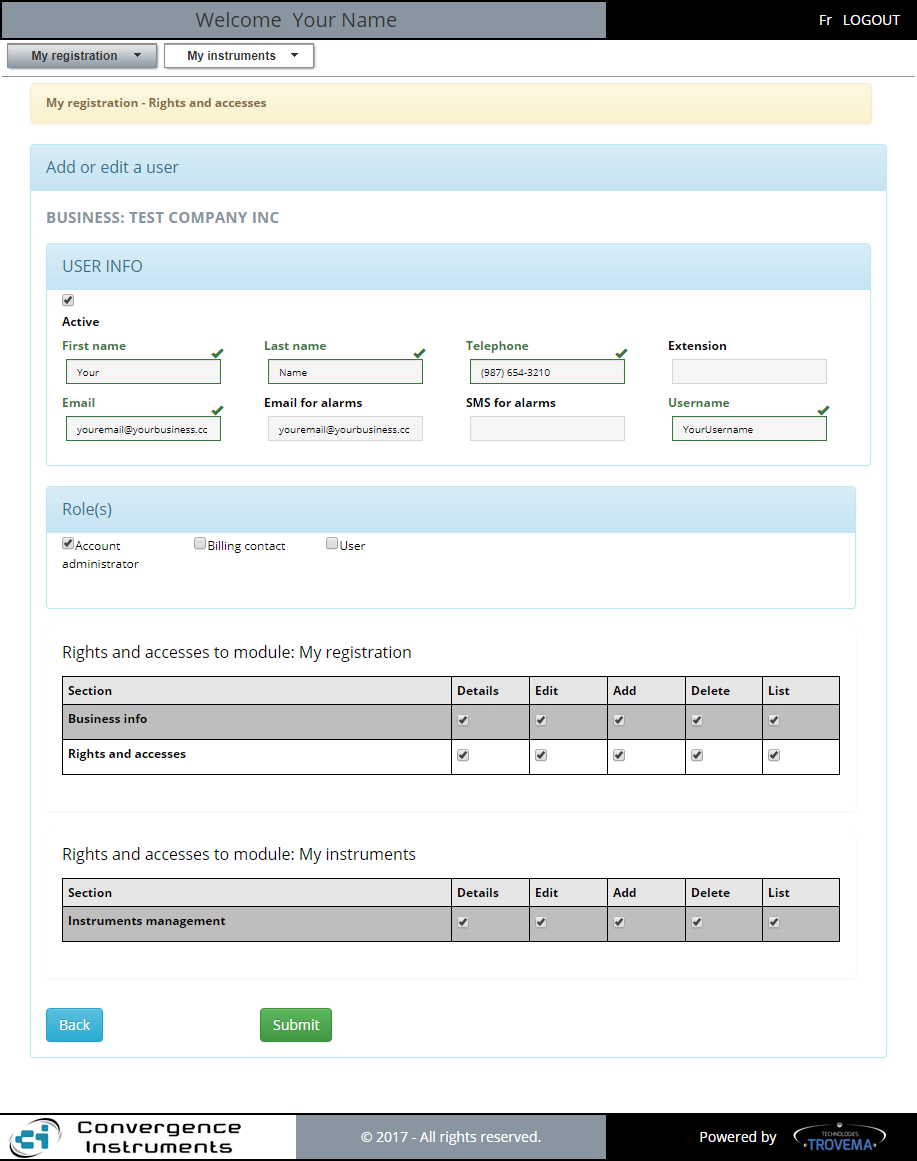
When the form is completely filled, two buttons are made available at the bottom of the form:
| 1. | The  "Back" button (always available) is used to go back to the "Rights and accesses" tool without saving the form and its content to the database. "Back" button (always available) is used to go back to the "Rights and accesses" tool without saving the form and its content to the database. |
| 2. | The  "Submit" button is used to save the form and its content to the database prior to returning to the "Rights and accesses" tool. "Submit" button is used to save the form and its content to the database prior to returning to the "Rights and accesses" tool. |
|
"Rights and accesses" Management table:

The table contains useful information for all users inside your CIDataSolutions™ business account. You can scroll top to bottom of the accounts list to see the status of your users and related "Rights and accesses" - "Actions" tools they can use.
Let's look at the details of the table:
| 1. | First column shows the "Status" (Active/Inactive) for users inside the "Business account", as long as they have not been removed. |
| 2. | Second column shows the "User" (first name - last name) list. |
| 3. | Third column shows the "Role(s)" they are given. Multiple roles is possible for the same individual. |
| 4. | Fourth column shows the only "Actions" possible "Rights and accesses" tools available to them. Those can be: |
| 1. |  : "Information" tool provides information on all users within your CIDataSolutions™ business account. : "Information" tool provides information on all users within your CIDataSolutions™ business account. |
| 2. |  : "Edit" tool gives the user the privilege to edit or modify rights and accesses of all users within your CIDataSolutions™ business account. : "Edit" tool gives the user the privilege to edit or modify rights and accesses of all users within your CIDataSolutions™ business account. |
| 3. |  : "Remove" tool gives the user the privilege to remove rights and accesses to all users within your CIDataSolutions™ business account. By doing so, the user might no longer exist, so be careful with this tool! : "Remove" tool gives the user the privilege to remove rights and accesses to all users within your CIDataSolutions™ business account. By doing so, the user might no longer exist, so be careful with this tool! |
| 4. |  : "Renew Password" tool allows the user to initiate the renewal of the password for users that forgot their password. That action is not needed if he only forgot his user name. The system's reaction will be to send an email to the user that needs a new password. One cannot ask himself to renew his own password with this tool. See the "Forgot your password" topic below if that is what you are looking for. : "Renew Password" tool allows the user to initiate the renewal of the password for users that forgot their password. That action is not needed if he only forgot his user name. The system's reaction will be to send an email to the user that needs a new password. One cannot ask himself to renew his own password with this tool. See the "Forgot your password" topic below if that is what you are looking for. |
If you forgot your password, simply click on the "Forgot your password?" link located at the bottom of the "Login Window".

You will be asked to type your email address that was used to identify you. Do not create a new one here6,7. CIDataSolutions™ will send you a fresh temporary password to your email box in a few seconds.
| • | You type your email address, followed by a single mouse click on the "Submit" button. |
| • | Use those as if it was your first login and follow the "First Login" procedure. |
| • | When all set, proceed with a normal Login, but use your new permanent password! |
Note 6: If your are a regular user and you lost your password, you must ask the "Account Administrator" person to reset your credentials with his CIDataSolutions™ credential tool associated to your name and found under "My registration - Rights and accesses".
Note 7: It is a good idea to save your username and password in a safe location. If your password is strong, you could keep it for years to come!
|
|
 Rights and accesses tool