7.3.4.1 Timer Setting

Contents
When the Timer button is pressed, the timer settings panel appears.
Either use the direct entry field (Figure 6 (4)), or press the Calendar View button (Figure 6 (3)) to set the date and time when the recording must start.
Press the OK button to exit and arm the timer.
Press the Cancel button, or the Window-Close button to exit without arming the timer.
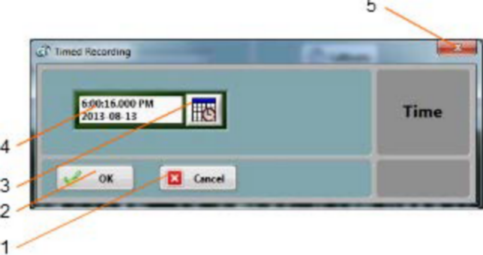
Figure 6 Timer Settings Panel
1. Cancel button – Closes the window without arming the timer
2. OK button – Closes the window and arms the timer
3. Calendar button – Brings the calendar view to enter date and time
4. Date/Time field – Can be used to enter date and time directly
5. Window close button - Closes the window without arming the timer
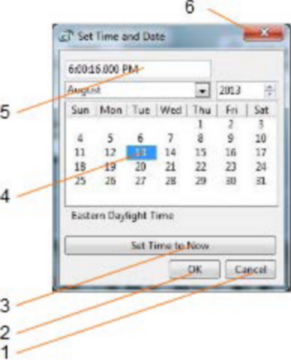
Figure 7 Calendar View
1. Cancel button – Closes the window without changing the date/time setting
2. OK button – Closes the window and accepts the newly set date/time
3. Set to Now button – Set the time and date to the present time
4. Date setting field – Click a date to set
5. Time setting field – Use the field to set a new time
6. Window close button - Closes the window without changing the date/time setting